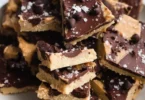

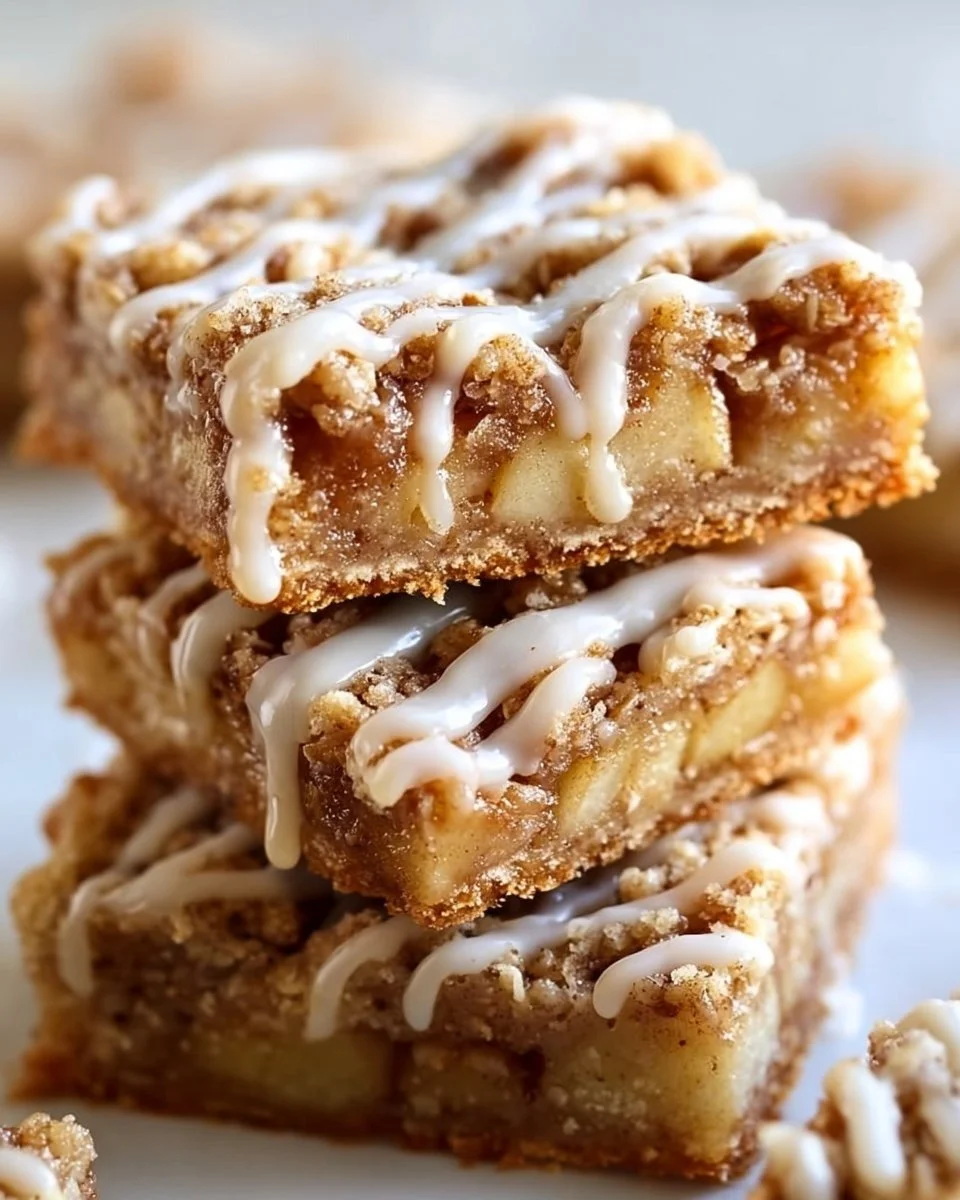
If you’re looking for a delightful dessert that captures the essence of autumn and fills your home with a heavenly aroma, look no further than these scrumptious apple bars! Tender, chewy, and bursting with the warmth of cinnamon and fresh apples, this treat is perfect for any gathering or just because. These apple bars are not only easy to make but also budget-friendly, making them a must-try recipe for both novice and seasoned bakers. Whether you enjoy them as a snack, dessert, or an afternoon treat with your favorite beverage, you’ll find that these bars are hard to resist!
What Makes This Recipe Stand Out
This apple bars recipe is a crowd-pleaser for several reasons. First, it’s incredibly simple to prepare, requiring minimal kitchen skills. With straightforward instructions and readily available ingredients, you can have a delicious dessert ready in no time. Plus, the combination of old-fashioned oats and buttery crumbs creates a delightful crumbly texture that pairs beautifully with the sweet and tart apple filling. It’s also perfect for any occasion, from casual family dinners to bake sales. When you can create such a mouthwatering treat at home, why go for store-bought?
Overview of Cooking Process
When it comes to assembling these apple bars, the process is straightforward and beginner-friendly. Start by making a crumb base that serves as both the crust and the topping. While it’s baking, prepare a sweet apple filling that gets mixed in with a splash of lemon juice and a hint of vanilla. Once the crust is golden, layer on the apple filling and sprinkle with the reserved crumb mixture. After a final bake, let it cool, drizzle with a simple glaze, and you’re ready to slice up these irresistible bars!
Ingredients
- Prep Time: 15 minutes
- Cook Time: 40-50 minutes
- Total Time: 55-65 minutes
- Servings: 12 bars
- 2 cups all-purpose flour
- 1 1/2 cups old-fashioned oats
- 1/2 cup granulated sugar
- 3/4 cup brown sugar
- 1 cup unsalted butter, cold and cubed
- 1/2 teaspoon salt
- 1 1/2 teaspoons ground cinnamon
- 1/4 teaspoon nutmeg (optional)
- 3 cups apples, peeled and chopped
- 1 tablespoon lemon juice
- 1 tablespoon cornstarch
- 1 teaspoon vanilla extract
- 1/2 cup powdered sugar
- 1–2 tablespoons milk (for glaze)
Key Ingredients Explained:
- All-Purpose Flour: Essential for building the crumb structure that gives the bars their deliciously soft and chewy texture.
- Old-Fashioned Oats: Add a nutty flavor and chewy texture, adding a wholesome quality to the dessert.
- Apples: The star of the dish, using sweet or tart apples enhances the overall flavor.
- Lemon Juice: Brightens the apple flavor and prevents browning, ensuring that the apples stay fresh.
- Cinnamon: Provides a warm spice that complements the apples beautifully.
Step-by-Step Instructions
- Preheat the Oven: Start by preheating your oven to 350°F (175°C). Line a 9×13-inch baking pan with parchment paper to prevent sticking and for easy removal later on.
- Make the Crust: In a large mixing bowl, combine 2 cups of all-purpose flour, 1 1/2 cups of old-fashioned oats, 1/2 cup of granulated sugar, 3/4 cup of brown sugar, 1/2 teaspoon of salt, and 1 1/2 teaspoons of ground cinnamon. Mix thoroughly. Cut in 1 cup of cold, cubed unsalted butter using a pastry cutter or fork until the mixture resembles coarse crumbs. This helps to create a nice flaky texture in the finished bars.
- Prepare for Baking: Take out 1 ½ cups of the crumb mixture and set it aside for topping later. Press the remaining crumb mixture firmly into the bottom of your prepared baking pan to form an even layer. Bake in the preheated oven for about 10-12 minutes until lightly golden, which will enhance the flavor of the crust.
- Make the Apple Filling: While the crust is baking, prepare the apple filling. In a medium bowl, toss together 3 cups of peeled and chopped apples with 1 tablespoon of lemon juice, 1 tablespoon of cornstarch, 1 teaspoon of vanilla extract, and if you wish, 1/4 teaspoon of nutmeg. This mixture not only flavors the apples but also helps to thicken the filling as it bakes.
- Add the Filling: Once the crust is out of the oven, spread the prepared apple mixture evenly over the pre-baked crust. Be sure to coat every corner! Then, sprinkle the reserved crumb topping over the apple filling to get that nice crunch once baked.
- Final Bake: Return the pan to the oven and bake for an additional 30-35 minutes, or until the topping is golden brown and the filling is bubbly. It’s wise to keep an eye on the edges to prevent over-browning.
- Cool and Glaze: Allow the bars to cool completely in the baking pan on a wire rack. While waiting, whisk together 1/2 cup of powdered sugar and 1-2 tablespoons of milk until you reach a smooth, pourable consistency. Drizzle this glaze over the cooled bars for a sweet finish before slicing into squares.
Creative Ways to Serve These Delicious Bars
These apple bars can be served in various delightful ways! For a wholesome snack, cut them into smaller squares and enjoy them alongside a cup of coffee or tea. They also make fantastic desserts. Serve them warm with a scoop of vanilla ice cream on top to elevate the experience into a true indulgence. These bars are perfect for potlucks, picnics, or family gatherings. They pair beautifully with spiced cider or a light dessert wine, making every occasion feel special.
How to Store and Reheat Your Delicious Apple Bars
To store your apple bars, allow them to cool completely, then cover the pan with plastic wrap or transfer individual bars to an airtight container. They can be kept in the refrigerator for up to a week. For longer storage, these bars freeze exceptionally well. Just wrap them tightly in foil or plastic wrap, then place them in a freezer-safe bag; they will last for up to three months in the freezer.
When you’re ready to enjoy them again, simply take a bar or two out of the freezer and allow them to thaw in the refrigerator overnight. You can also pop them in the microwave for about 15-20 seconds for a quick warm-up or warm them in the oven at a low temperature until heated through. Adding a little more glaze or a scoop of ice cream can also refresh their appeal!
Expert Advice for Perfect Apple Bars
To ensure your apple bars turn out perfectly every time, consider these pro tips. First, measure your ingredients accurately for consistent results. Using cold butter is key to achieving that delightful crumb texture. If using fresh apples, opt for a mix of sweet and tart varieties to enhance the flavor. When cutting the bars, use a sharp knife and wipe it clean between cuts to maintain clean edges.
Be cautious about overbaking the bars; keeping an eye on them towards the end of the baking time is crucial. If you’re not sure, it’s better to check early. Additionally, avoid using too much filling as it can make the bars too soggy or difficult to slice neatly.
Explore Delicious Variations
While this recipe is fantastic as is, don’t hesitate to get creative! For a nutty twist, consider adding 1/2 cup of chopped walnuts or pecans into the crumb mixture for added crunch and flavor. For those seeking an extra touch of sweetness, consider incorporating dried cranberries or raisins into the apple filling.
Feel free to swap out the spices as well; a touch of ginger or cardamom can create a different flavor profile. If you’re looking for a gluten-free option, substitute the all-purpose flour with a gluten-free blend and ensure that your oats are certified gluten-free. There are endless possibilities to make this recipe uniquely yours!
Your Burning Questions About Apple Bars Answered
- Can I use other fruits instead of apples? Absolutely! Pears, peaches, or a combination can be used. Just keep in mind the moisture content of the fruit.
- How do I know when the bars are done? The topping should be golden brown, and the filling should be bubbly. If you pierce it with a toothpick, it should come out somewhat clean.
- Can I add ice cream on top? Yes, a scoop of vanilla or caramel ice cream pairs perfectly with these bars!
- Can I make these vegan? Yes! Substitute the butter with coconut oil or a vegan butter alternative and use a flax egg instead of regular eggs if you choose to use them in any variations.
- Can I prepare the mixture in advance? Indeed! You can prepare the crumb mixture and refrigerate it overnight for ease when baking.