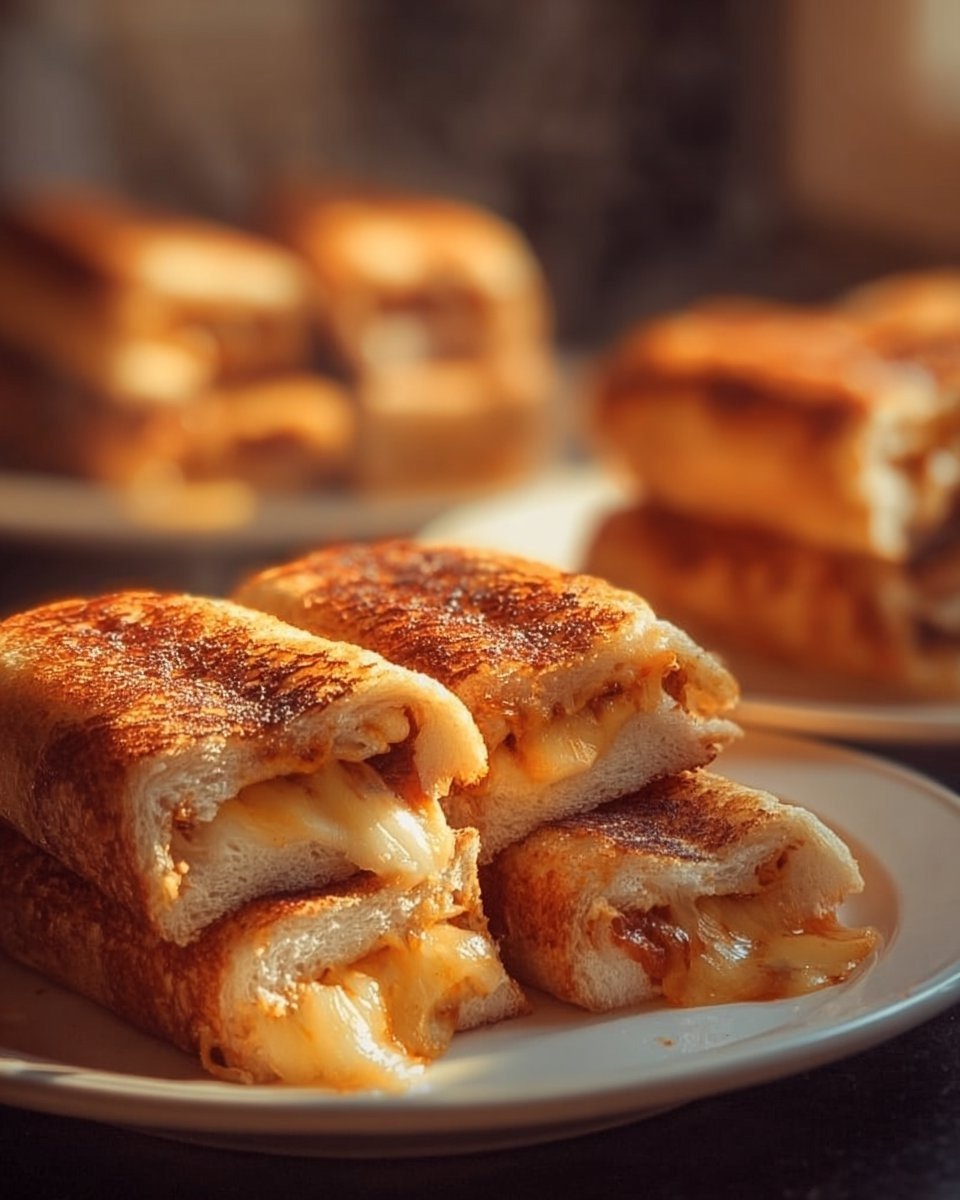
If you’re looking for a quick, tasty snack that will impress your family and friends, look no further than these Crispy Cheesy Roll Ups. This delightful dish brings together the comfort of melted cheese and the satisfying crunch of crispy bread, making it a perfect choice for lunches, snacks, or even a party appetizer. Kids and adults alike will rave about this simple yet flavorful treat, making it a must-try recipe for your cooking repertoire.
What Makes This Recipe So Good
This recipe is fantastic for so many reasons. First and foremost, it’s incredibly easy to make, requiring just a handful of ingredients that you likely already have in your kitchen. The preparation time is minimal, making it an ideal choice for a quick snack or meal. Additionally, it’s budget-friendly, allowing you to whip up something delicious without breaking the bank. With just a few simple steps, you can create a delightful appetizer that everyone will enjoy!
Understanding the Cooking Process
The process of making Crispy Cheesy Roll Ups is as simple as it is satisfying. You start by flattening the bread to make it more pliable, then add your choice of cheese and roll it all up tightly. After spreading some butter on the outside for that gold and crunchy texture, you cook it in a skillet until every side is perfectly golden. The beautiful thing about this recipe is that it’s almost foolproof! Even if you’re a novice in the kitchen, you’ll achieve delicious results.
Ingredients
Prep time: 10 minutes
Cook time: 10 minutes
Total time: 20 minutes
Servings: 2
- 4 slices of bread
- 4 slices of cheese (cheddar or your choice)
- Butter or margarine (for spreading)
- Tomato soup or marinara sauce (for dipping)

Step-by-Step Instructions
- To start, take each slice of bread and flatten it using a rolling pin. This step is crucial as it helps create a smooth roll that’s easier to work with.
- Next, place a slice of cheese at one end of each flattened bread slice. Be sure to roll it up tightly, sealing in all that cheesy goodness.
- Spread butter on the outside of each roll. This not only adds flavor but also helps to achieve that beautiful golden color when cooked.
- Heat a skillet over medium heat. Once hot, carefully place the roll ups seam-side down in the skillet.
- Cook each roll until golden brown and crispy on all sides, which should take about 2-3 minutes per side. Don’t rush this step; it’s where the magic happens!
- Finally, serve these delicious roll ups warm, accompanied by tomato soup or marinara sauce for a delightful dipping experience.
Creative Ways to Serve Your Roll Ups
Crispy Cheesy Roll Ups make a fantastic standalone snack, but they are also brilliant when paired with some delicious sides. Consider serving them with a fresh garden salad or some crunchy vegetable sticks for a balanced meal. For a casual get-together or a movie night, why not add some refreshing drinks like lemonade or iced tea? They elevate the entire experience, making it feel more special.
How to Store and Reheat
If you happen to have any leftovers (which is unlikely, but it happens), you can store them in an airtight container in the fridge. They should be good for about 2-3 days. To reheat, simply place them back in a skillet over medium heat; this will help restore their crispy texture. You can also try using an oven at 350°F (175°C) for about 10-15 minutes for a more even re-crisping.
Helpful Cooking Tips
To ensure your Crispy Cheesy Roll Ups turn out perfect every time, here are a few tips:
- Make sure to roll the bread tightly to prevent the cheese from leaking out during cooking.
- Experiment with different types of cheese. While cheddar is a classic choice, mozzarella or pepper jack can provide a unique twist.
- Keep the heat at medium to avoid burning the bread before the cheese melts. Patience is key!
Delicious Variations to Consider
Feel free to get creative with this recipe! Here are some fun variations:
- For a spicy kick, add jalapeños or a sprinkle of cayenne pepper inside the roll.
- Incorporate some cooked bacon or ham for an added layer of flavor.
- For a vegetarian option, add some spinach or sautéed mushrooms inside the roll before cooking.
Frequently Asked Questions
Can I use gluten-free bread for this recipe?
Absolutely! Just make sure to choose a gluten-free bread that is sturdy enough to hold the filling.
What kind of cheese works best?
Cheddar is a fantastic option, but you can experiment with others like mozzarella, gouda, or even cream cheese for added creaminess!
Can I make these roll ups in advance?
Yes! Prepare everything and store the uncooked roll ups in the fridge for a few hours before cooking. Just make sure to cook them right before serving for the best texture.
Is this recipe suitable for kids?
Definitely! Kids love cheesy snacks, and this recipe is simple enough for them to help with under adult supervision.
Can I bake these roll ups instead of frying them?
Yes! Preheat your oven to 375°F (190°C) and bake the roll ups on a baking sheet for about 15-20 minutes, turning halfway through.